Wednesday, December 18, 2013

DIY $5 Dessert Stand

Hi there! Welcome to the first edition of $5 DIY!
And by "edition", I mean, this project only costs $5, and maybe I'll post more $5 projects at some point. ;]

My most recent project was this easy-peasy three tiered dessert stand:


Supplies for this project are:
Two glass candle sticks (I found mine at the Dollar Tree)
Three glass plates of different sizes ($.99 each at thrift store)
Glass glue (I used E6000 because I already had it from prior crafts)


Make sure you clean your plates and candle sticks well before you start because 1. whatever is on there will be on there forever once they're glued and 2. dust/dirt affects adhesion.


I started by spreading the glue with a toothpick on both the plate and the edge of the candlestick, and gluing the two candle sticks to the tops of of two bigger plates.


I initially tried using a compass and paper and tracing and finding centers and such... but then I just decided to eyeball it. =]


Glue them wide side up so that you have more usable surface area on your stand.

Let dry fully. (Dry time varies by glue.)


Glue them in succession of largest to smallest, allow to dry again, and then serve dessert on your beautiful new tiered dessert stand!

Saturday, December 14, 2013

A Whovian Celebration

Here's one for my Whovian friends! You already know that one month ago today was a special day... the Day of the Doctor! For my non-Whovian friends, an epic 50th anniversary episode of Dr. Who aired.

My contribution to the celebration was a dozen Dalek cupcakes, made by printing some excellent (and free!) cupcake wrappers found here. Some of our other festive snacks were bowties (are cool) pasta salad and fish fingers and custard. Of course. 

So, without further delay, here they areOr should I say, "Allons-y!"


Wednesday, November 27, 2013

The Best Thanksgiving Ever


Let me tell you a little bit about Thanksgiving in my family. We celebrate at my parents’ house with friends and their families. We have turkey, stuffing, sweet potatoes, and Indian food. We always play bingo. I’m looking forward to all of these things tomorrow.

Now, let me tell you about my best Thanksgiving ever. It was not at my parents’ house. In fact, none of my relatives were there. In fact, it wasn’t even in a country that celebrates Thanksgiving.

My best Thanksgiving ever was in Hanham, Bristol, England.

There was no pumpkin pie, because canned pumpkin was not available for purchase at any local stores.

The marshmallows on top of the sweet potatoes turned into rock solid sheet because marshmallows have a different consistency in the UK.


But let me tell you why it was the best… Everyone still tried the weird sweet potatoes. They even pretended to like them.

More so, it was the fact that my host parents, Peter and Denise, let me host a Thanksgiving celebration in their home, helped me purchase all of the food for the feast, helped me prepare it all in their kitchen, and invited friends over to join us.


The friends all came, bringing wine and gifts, willing and excited to learn about my holiday.

They let me teach them how to trace their hands to make “thankful turkeys,” and they all made one even if they felt silly doing so.
  

The rest of the food was not as disastrous as the sweet potatoes, and we all ate delicious turkey and stuffing and mashed potatoes, and talked and laughed together.
 
I was and still am so thankful for those people. I don’t know if they remember their American Thanksgiving experience, but I will always remember their hospitality and love, and how at home they made me feel in another country.

Tuesday, November 26, 2013

A Black Day and a New Day


When I think about Thanksgiving approaching this week, my thankfulness for a few days off work is almost tangible. I am so excited for a few days out of the city, relaxing with family, in a warm home filled with our good friends.

In contrast, when I think about Black Friday approaching this week, I feel a little sick. The juxtaposition of a day of appreciation with a day of violent consumerism is sickening.

I know that plenty of people have taken notice. I’ve seen plenty of Black Friday boycotting popping up in my news feed and on blogs. I am not the only one.

But I am going to start with me.

I choose not to participate in the consumerism of Black Friday. I will not nullify the previous day’s thankfulness with lust for more.

But it is not just Black Friday; I am making a choice not to participate in consumerism period. In contrast, I want to simplify.

I don’t mean living without electronics or other modernity.

I mean viewing everything I own as what is truly is. A thing. A gift I was given. Something that can just as easily be given away.

Maybe when I am able to give more and clutch on to less, I can be truly thankful for Him who gave all to me in the first place.

This is a process, and one I am just beginning.

But I am beginning by choosing not to participate this Black Friday.

Saturday, November 23, 2013

Christmas Light Upgrade!

Hi friends! If you have a string of Christmas lights and ping pong balls lying around, you're in luck; those are the two supplies needed for today's project! Put together, they make a pretty string of soft glowing bulbs!

Okay, so I didn't have ping pong balls just lying around; I ordered them in bulk from Amazon specifically for this. But they're very inexpensive if you look in the right places! I've found that if you search for "beer pong" balls, you can get the cheap ones for, well, cheap! The thinner the material, the easier it is to poke an "x" into the ball with an exacto knife.

I don't think this project needs much explaining, so I'll stop talking and give you the pictures. Here we go!


I love the soft glow these produce, so I leave them up year round. I've even put them out on the patio for special events!


Note: Some commenters have mentioned that ping pong balls are flammable, so you should use LED lights which don't get hot! I, however, have had mine on normal Christmas lights for several years now, and no heat issues yet!

Thursday, November 21, 2013

An Easy Favorite: Banoffee Pie!


I have a go-to dessert that I like to make, and every time I do I get asked for the recipe.
Now the thing is, I don’t use a recipe. But… you don’t have to either!

Proportions are totally up to your tastes, and you can change it up every time you make it, but here are the basics of my one of my favorites, Banoffee Pie!


I apologize for the pictures. I waited too long, and the majority of the pie was consumed by the time I got out the camera!

Crust:
2 cups crumbs- classic graham crackers work, digestive biscuits are more commonly used, HobNobs are my absolute favorite if you can get a hold of them.
6 tablespoons melted butter
If you feel inclined, add ½ tsp of cinnamon or nutmeg

Filling:
2 cans sweetened condensed milk
3(ish) bananas (Sometimes some banana slices end up getting eaten during this process. That’s just a necessary sacrifice.)
2 cups heavy cream
1 tsp almond extract
Handful of chocolate chips or shavings. I like to use mini dark chocolate chips.

Let’s start with the sweetened condensed milk. You can do this step a month in advance, or a day, or do it the day of if you have the time. Remove the labels. You are going to place your unopened cans of sweetened condensed milk into a big pot of boiling water and boil for 2.5 hours.


Make sure they stayed covered in water the whole time, or else they will EXPLODE. (Just picture that for a moment.) After 2.5 hours, remove and allow to cool before opening.

Combine crust ingredients well and press into 9 inch pie pan or a 9x13. Bake at 375° F for 10 minutes, and then allow to cool.

Cut your bananas into coins and scatter them in your cooled crust.

Open your cans of sweetened condensed milk, which are (magically!) now toffee. Stir them well and pour over the bananas until they are covered. I usually only use a can and a half, leaving half of a can of toffee for other delicious uses.

Whip your two cups heavy cream and extract with a hand mixer or food processor until cream forms fluffy peaks. Dollop evenly over your pie, or spread with spatula. Sprinkle your chocolate on top.


Voila. =]

Wednesday, November 20, 2013

Christmas is Coming: Font Roundup!

There are several things that make me feel excited enough to use all caps.
CHRISTMAS TIME is one of them. TYPOGRAPHY is another.
Therefore, FREE CHRISTMAS FONTS make me really excited!!
 I've rounded up some of my favorite new fonts for your downloading pleasure, should you feel so inclined.
(Remember, click the grey Download button on the righthand side of the font preview. other "download" links are ads!)

Monday, October 28, 2013

Engaged: Toby & Kerrigan!

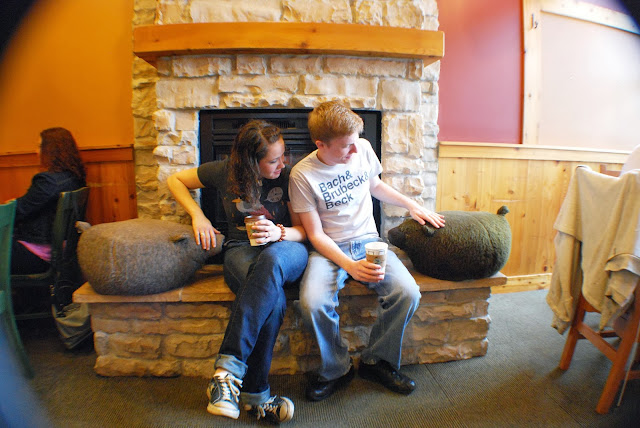
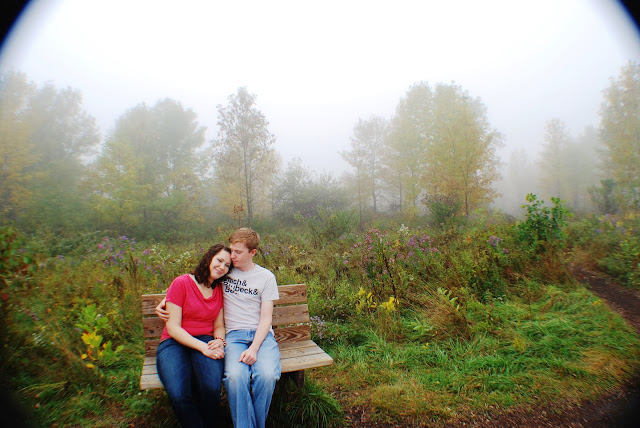
Remember that sappy blog post I wrote a few weeks back? Well I have a few more pictures from their engagement shoot to share. We started out at Caribou Coffee, an important place in our group of friends, and in Kerrigan and Toby's relationship, and then ventured to Lion's Den Gorge Nature Preserve, where he popped the question in September! It was probably the foggiest day I've ever seen in Wisconsin, but we went with it, and it was a pleasure to photograph them.


Thursday, October 10, 2013

An Autumn Instagram Round-up

Sharing some of my autumny instagrams... Some of my projects, and just some lovely fall scenery.

I love this time of year...


Wednesday, October 9, 2013

As iron sharpens iron...

Today my beautiful best friend left for Thailand.

That sentence holds a lot of emotions. 

I am so thankful for Toby. When I returned from England, I prayed and prayed for an encouraging Godly woman to call a close friend. She came in an unexpected form, of someone very different from me, but someone that God placed in my life just at the right time and used immensely to bless me. She has become my encourager, partner in adventure, a wonderful bridesmaid, and confidante. 

Today she embarked on a journey to the slums of Pattaya in Thailand. I can't imagine anyone more perfect to rise up to this opportunity, but hey, that's why God called her, right? I have the privilege of hearing about what God is doing there in her and through her, and praying for her during the journey.

Shortly after she returns in six months, she'll be embarking on another exciting journey. Next summer, she will be marrying an incredible man named Kerrigan. Kerrigan is another person who God put in my life very specifically, although at a much earlier time. There were countless times that God imparted wisdom in my life through Kerrigan, throughout high school and early adulthood. 

These two have been a blessing to me separately, and I can't even begin to imagine the value they'll add to His Kingdom as they do life and ministry together, faithfully serving Christ.

Thomas and I enjoyed shooting their engagement pictures last weekend, and here's the first of a beautiful set:

I love you guys and thank God for putting you in our lives!

Tuesday, August 6, 2013

Happy 40th!

I just made my 40th sale on Threadflip.

"On what?" you ask? Threadflip is a fashion marketplace that allows you to sell your used designer and vintage clothing and accessories.

You set up your shop page, and Threadflip facilitates the payment processing and created the shipping label. Easy peasy.

If you want to try it out, you get $5 just for joining using my referral link!

http://www.threadflip.com/referrals/69z0

There's no fees or catches or clauses, just a great way to recycle your closet, and find used designer pieces!

Monday, August 5, 2013

Raindrops on Roses and Foxes on Mason Jars


I’m STILL finding uses for all of those mason jars from our wedding décor. Last weekend, I decided to top some with plastic animals.


My husband’s first response was to question the functionality, but I’m afraid there is none…


They’re just cute.
They function as jars, so you can fill them with your craft supplies, like beads and crayons, or bathrom good, like qtips and bath salts, or with your sewing notions, like pins and buttons, or office supplies, like pushpins and paper clips, or fill them with delicious treats to give to your friends. I’m sure they’ll say, “my, what a cute animal lid!” and not, “what purpose does this animal serve?”
ANYWAY…
Supplies:
Mason jars
Lids that fit your jars- these can be upcycled salsa or pasta sauce or jam lids, or new canning lids.
Figurines for on top- animals, toy cars, action figures, etc
Super glue/gorilla glue/ any glue that bonds both surfaces
Spray paint (I used Rustoleum Painter’s Touch Spray in Jade.)
Instructions seem a bit silly, as this is quite self-explanatory. But I will share my pictures as well as the mistakes I made so that you don’t make them too.

Starting out…


Animals successfully glued to lids.


Tom’s creation- some sort of flying deer hybrid creature.


Painted! This one was more successful than my first attempt, where I sprayed too close and too thick, causing bubbling during drying. Lesson learned: obey the spray paint can instructions.


I’m going to use these for crafty bits and bobs.
Voila! Quick and fun project. =]